

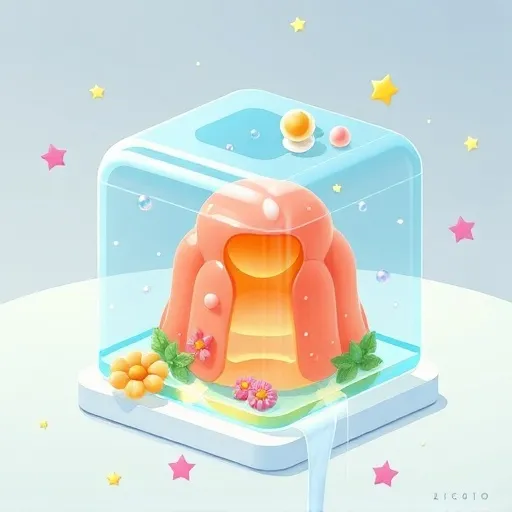
3d jelly art in clea
What Exactly Is 3D Jelly Art?
At its heart, 3d jelly art is the craft of building three-dimensional designs inside a block of translucent jelly. The go-to medium is clear jelly made from agar-agar or a similar gelling agent, which lets light pass right through and gives each piece a glass-like, almost enchanted look. Unlike a cake where frosting sits on top, everything in 3d jelly art happens within the dessert itself — and that's exactly what makes it so hypnotic.
Artists rely on syringes, thin needles, and specialized tools to inject colored jelly into the clear base. Layer by layer, they build up shapes — flowers, fish, butterflies, koi, whole underwater scenes — that seem to float suspended inside the jelly. Slice into it, and the design reveals itself in cross-section, almost like a 3D printer made of fruit flavors. That reveal is the payoff, and it's why 3d jelly art keeps pulling people in.
What separates 3d jelly art from traditional cake decorating is simple: you're not decorating a dessert — you're sculpting within it. The artwork lives inside the medium, and that's the whole magic trick.
A Quick Look at How This Jelly Art Trend Evolved Across Southeast Asia and Beyond
The roots of 3d jelly art trace back to Southeast Asia, where talented creators started experimenting with agar-based desserts and injecting colored layers into clear jelly. Those early experiments got shared online, and the internet did what it does best — it amplified them. By the early 2020s, short-form video platforms turned jelly art into a global phenomenon. A single 30-second clip of an artist injecting a perfect flower into a clear jelly block could rack up millions of views overnight.
Fast forward to 2026, and the landscape looks totally different. What used to demand years of practice and steady hands is now more accessible than ever, thanks to smart injection tools that help beginners control flow and pressure, pre-mixed jelly kits with color-coded syringes, AI-assisted design apps that let you preview a 3D design before committing it to jelly, and online masterclasses taught by seasoned creators worldwide. What hasn't changed is the skill and patience required to do 3d jelly art well.
Why 3D Jelly Art Is Booming in 2026 Thanks to Social Media and Visual Content
Search algorithms love content that stops people mid-scroll, and 3d jelly art does exactly that. The contrast between a plain, clear block and the intricate scene hidden inside is pure visual candy. For creators, one well-shot video can bring thousands of new followers. For businesses, a single dessert can become a viral marketing asset.
Unlike many food trends that are purely visual, 3d jelly art is also about taste, texture, and the experience of cutting into something beautiful. That multi-sensory appeal makes it memorable — and memorable content gets shared. You can make 3d jelly art for birthdays, weddings, corporate events, or just a Tuesday night at home. Designs range from simple hearts and stars for beginners to incredibly complex underwater ecosystems for advanced artists. And if you spend any time in online jelly art communities in 2026, you'll notice something refreshing: people actually help each other.
Essential Tools and Ingredients for Getting Started With 3D Jelly Art
Before you dive in, let's talk about what you actually need. You don't have to spend a fortune, but you do need the right basics. For core ingredients, grab agar-agar powder — the gold standard for clear, firm jelly that holds its shape — plus a clear liquid base (usually water, sometimes with a mild flavor like lychee or coconut), food-grade coloring, flavor extracts, and sugar or sweetener to taste.
For key tools, you'll want syringes with fine needles — the workhorses of 3d jelly art — plus metal molds or silicone containers for setting your clear base, a thermometer to hit the right temperature, small mixing cups for blending colors, and honestly, patience. If you're a total beginner, look for a starter kit that bundles these items together.
Basic Techniques You Should Learn First in 3D Jelly Art
Let's keep it real: 3d jelly art has a learning curve. The layering method is your foundation — pour a thin layer of clear jelly, let it set partially, then inject a small amount of colored jelly. Repeat. The injection technique is all about angle, depth, and speed. Color blending matters too, since most 3d jelly art relies on gradients — soft pinks fading into white, deep blues shifting into teal. And don't forget negative space: sometimes the most striking part of a jelly design is what you don't fill.
Popular Design Styles Trending in 2026 for 3D Jelly Art
The jelly art community has developed distinct styles over the years. Right now, you'll see tons of floral compositions with layered petals, roses, and lotus flowers; underwater scenes packed with koi fish, coral, and seaweed; animal portraits featuring birds and butterflies; geometric and abstract swirls; and personalized designs like initials and dates. One emerging trend in 2026 is "story jelly" — multi-layer designs that reveal different scenes as you slice deeper into the block.
How to Make Your 3D Jelly Art Stand Out Online With Better Lighting and Storytelling
If your goal is to share your creations online, lighting is everything. Backlighting shows off the transparency and inner detail. Film the reveal — the cut is the moment of truth, and slow-motion slicing shots consistently perform well. Keep your background simple. And write descriptions that connect: tell a story about what inspired the design or how long it took. Personal stories humanize your 3d jelly art and invite engagement.
Common Mistakes Beginners Make With 3D Jelly Art (and How to Avoid Them)
You're going to make mistakes. But here are the ones you can dodge. Don't inject too hot — if the jelly is too warm, it melts the layer beneath it. Don't use the wrong needle size. Don't rush layers, because if you pour the next layer before the previous one sets, everything blurs. Don't overfill syringes. And don't skip practice — do a few throwaway attempts before working on a design you care about. Every artist you admire online has a trail of failed attempts behind them.
The Future of 3D Jelly Art: Interactive Designs, AR Previews, and Sustainable Ingredients
Looking ahead, 3d jelly art is only getting more sophisticated. We're seeing early experiments with interactive jelly art — designs that change color or reveal hidden shapes based on temperature — plus AR preview tools that let customers see a customized jelly design before ordering, sustainable jelly bases using plant-based gelling agents and natural dyes, and collaborations across disciplines with sculptors, painters, and digital designers. As tools get smarter and communities grow, expect to see 3d jelly art showing up in more places — high-end restaurants, boutique dessert shops, and even immersive art installations.
The world of 3d jelly art is waiting. All you need is a syringe, a steady hand, and the willingness to make something beautiful — one layer at a time.